In this article, we will build an Arduino-based egg incubator using an Arduino UNO and other associated devices. To create an incubator, we need to maintain optimal temperature and humidity, along with other parameters like CO₂. Since this is a learning project, we will focus on a basic incubator design. So, let’s get started with our Arduino-based egg incubator circuit!
⚠️Disclaimer:
Working with electricity involves serious risk. Ensure you have the necessary skills and take proper safety precautions before attempting any electrical projects. Proceed at your own risk — the author assumes no responsibility for any damage, injury, or issues resulting from the use or misuse of the information provided.
All content on this website is original and protected by copyright. Please do not copy or reproduce content without permission. While most of the resources shared here are open-source and freely accessible for your learning and benefit, your respect for our intellectual effort is appreciated.
If you find our tutorials helpful, consider supporting us by purchasing related materials or sharing our work — it helps keep the content flowing.
Need help or have questions? Leave a comment below — the author is always happy to assist!
Table of Contents
What is an Egg Incubator?
An egg incubator is a device designed to maintain optimal temperature and humidity levels, along with other factors like CO₂, to replicate the natural conditions a hen provides for hatching eggs. It is widely used in various biological and agricultural sectors. However, egg incubators are most commonly associated with the poultry industry, where they play a crucial role in increasing hatch rates and improving efficiency in chicken farming.
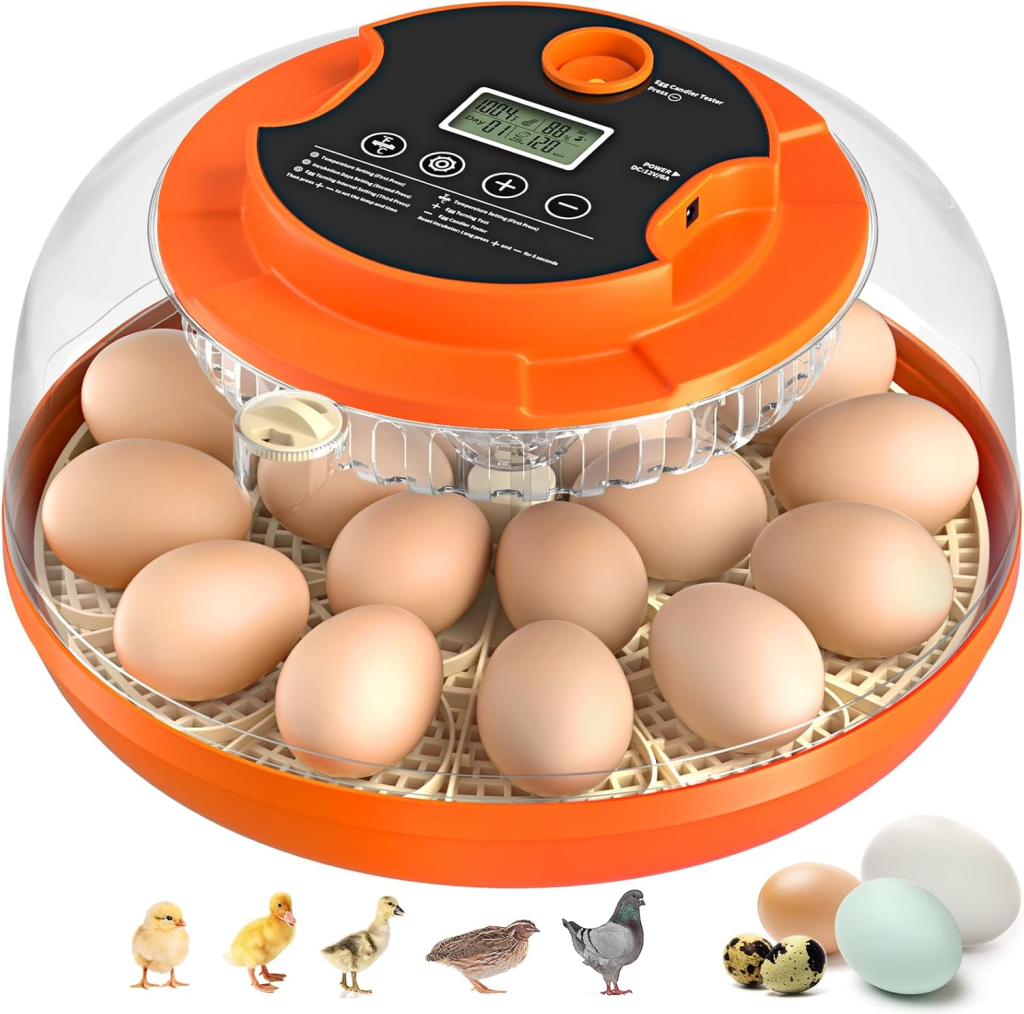
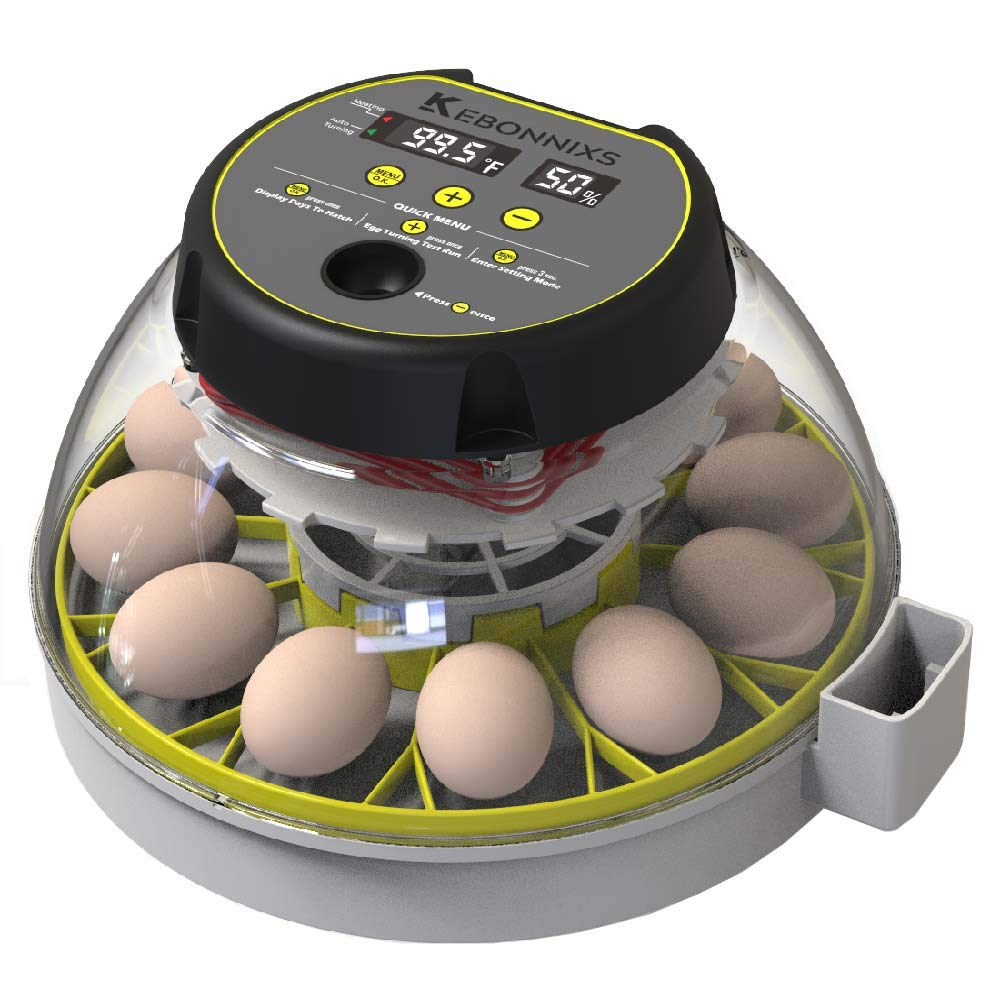
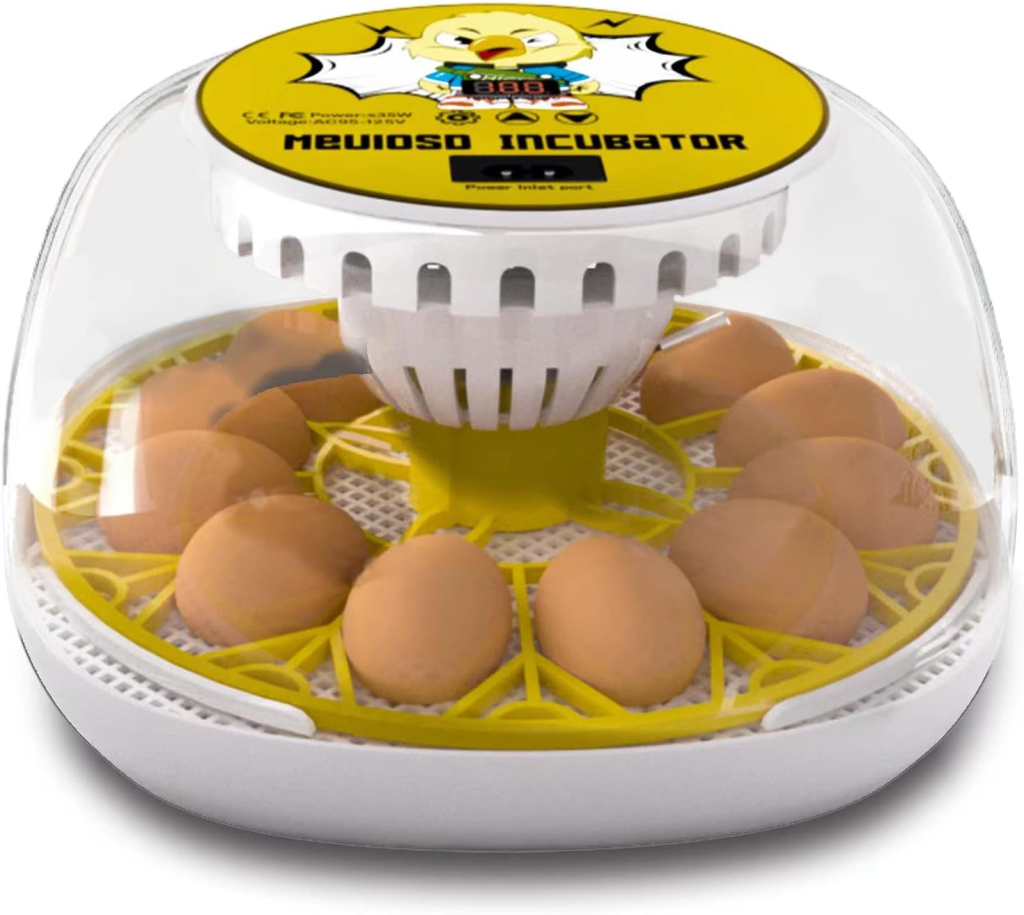
Here’s a look at a popular, commercially available egg incubator.

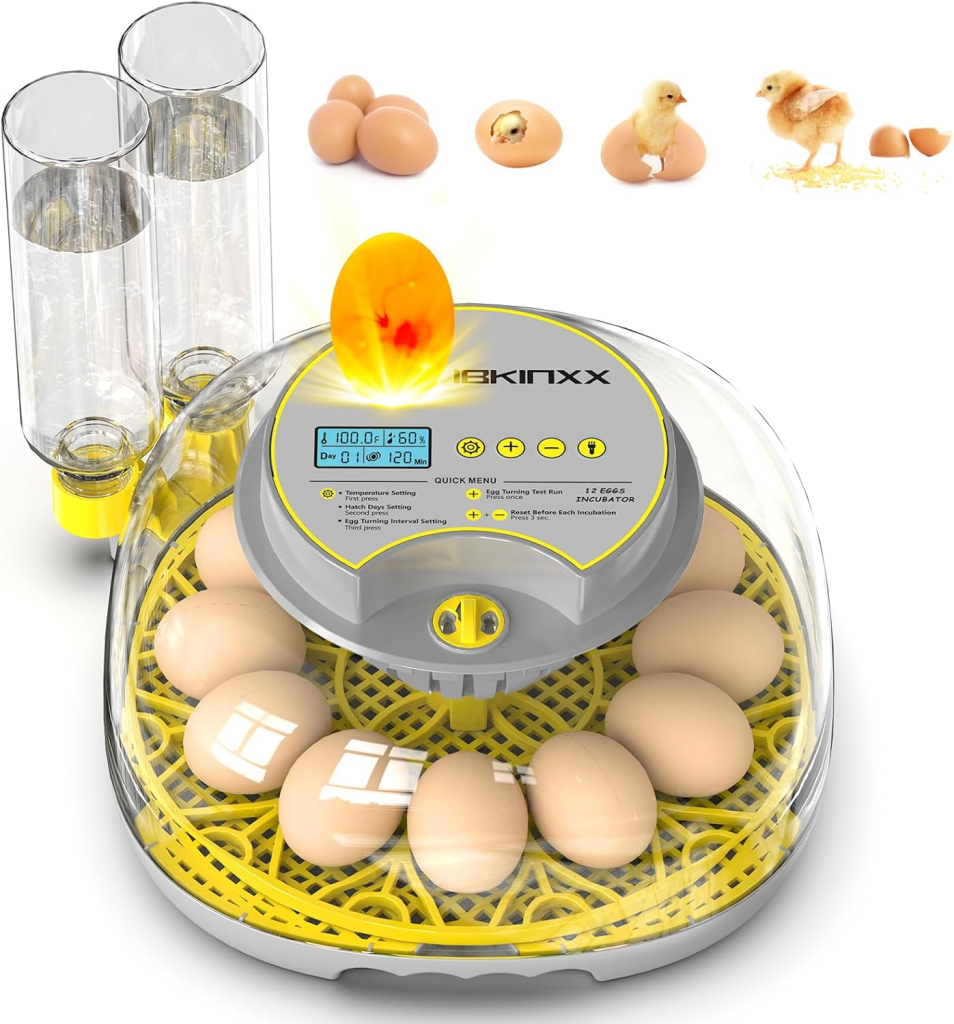
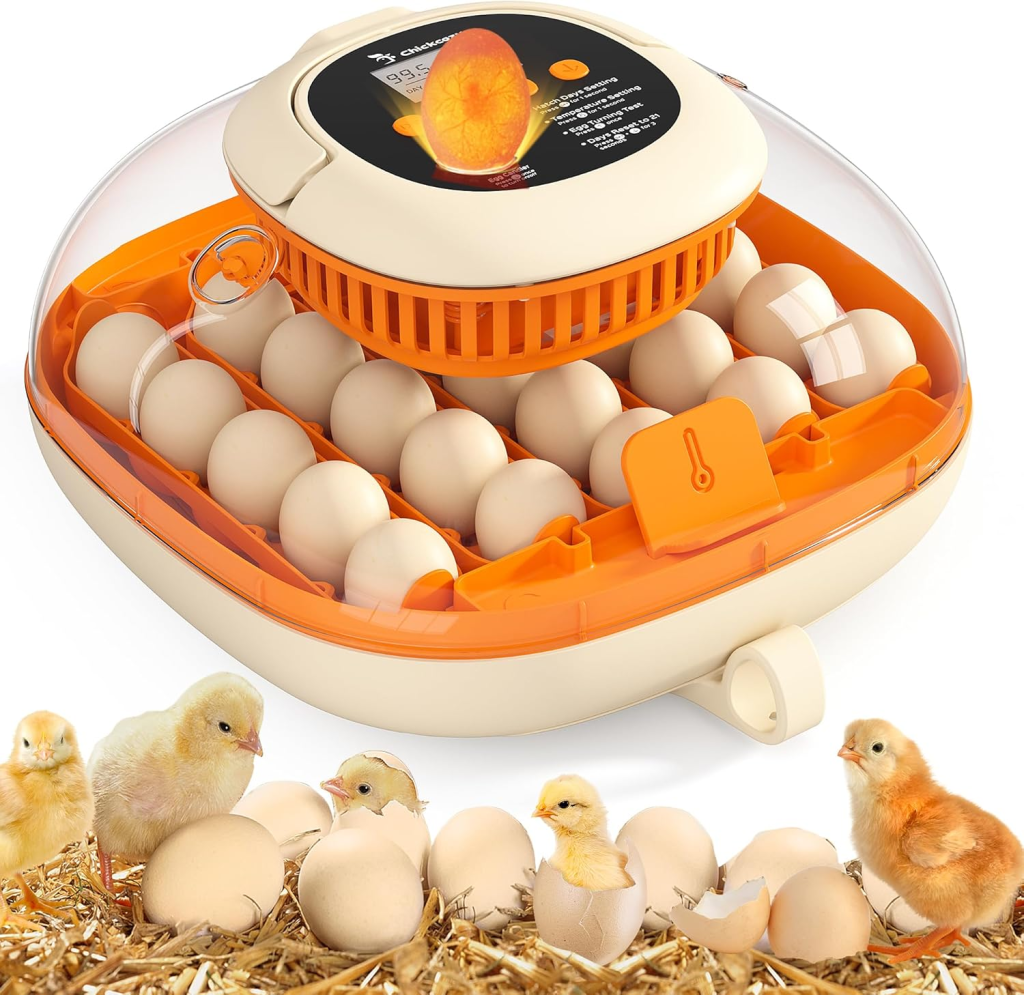
And our goal is to make this one our basic egg incubator:

Key Points for an egg incubator:
When designing an egg incubator, the most critical factor to maintain is temperature, followed by humidity and CO₂ levels. The larger the incubator’s egg capacity, the more precise control is required over these parameters.
Another essential task for ensuring healthy chick development is periodically turning the eggs. In nature, a hen does this instinctively while incubating her eggs. Additionally, it’s crucial to regulate and reduce CO₂ buildup inside the incubator to create an optimal hatching environment.
- Temperature control.
- Humidity control.
- Turning.
- CO2 level reduction.
Here we’ll make the very basic one. So that anyone can build one for himself.
Temperature Control:
Temperature Control in an Egg Incubator
To effectively regulate temperature in an egg incubator, we need a control system capable of heating, cooling, and sensing temperature. Proper heat distribution is also essential, which is why a circulating fan is necessary to maintain uniform warmth inside the incubator.
Essential Components for Temperature Control:
- Heater – Provides the necessary warmth for incubation.
- Cooling Fan – Helps prevent overheating by regulating temperature.
- Circulating Fan – Ensures even heat distribution inside the incubator.
- Relays – Used to switch the heater and fans on and off as needed.
- Temperature Sensor – Monitors and maintains the ideal incubation temperature.
By integrating these components, we can create a stable and controlled environment for successful egg incubation.
Heater:
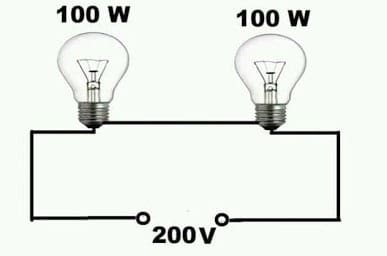
In large incubators, powerful heating elements are used to maintain the required temperature. However, for our small incubator, we will use incandescent lamps as the heat source. A 100-watt bulb should be sufficient for this purpose.
To reduce light intensity while maintaining the same heat output, we can connect two lamps in series. This setup will still consume 100 watts but will distribute the heat more evenly than a single bulb. If you add more lamps in series, the heat output per lamp will decrease, but the overall heat distribution will improve, ensuring a more balanced incubation environment.
Proper Cooling and Ventilation in an Egg Incubator:
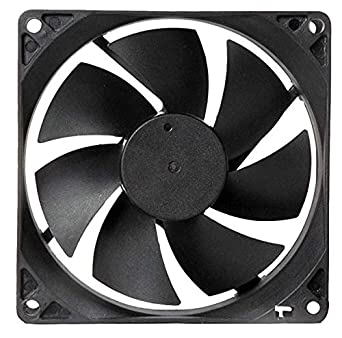
For effective cooling and CO₂ removal, the cooling fan should be positioned to blow air from outside to inside (unlike most common setups, which exhaust air from inside to outside).
Why Use an Outside-to-Inside Airflow?
- Temperature Control: It helps cool the incubator’s internal air.
- CO₂ Reduction: It simultaneously pushes out excess carbon dioxide (CO₂), improving air quality for the developing embryos.
What Happens to the Inside Air?
Some may wonder—if air is blown inside, where does the internal air go? The answer is simple: the incubator should not be airtight.
Why Airflow is Essential for Hatching Eggs
- Oxygen Supply: Hatching eggs need oxygen, just like we do, but in very small amounts. A controlled airflow brings fresh oxygen inside.
- CO₂ Removal: As the embryos develop, they release CO₂. If this gas builds up, it can negatively impact hatch rates and chick health. Proper ventilation ensures a healthy incubation environment.
By maintaining controlled airflow while preserving warmth, we create optimal conditions for successful hatching.
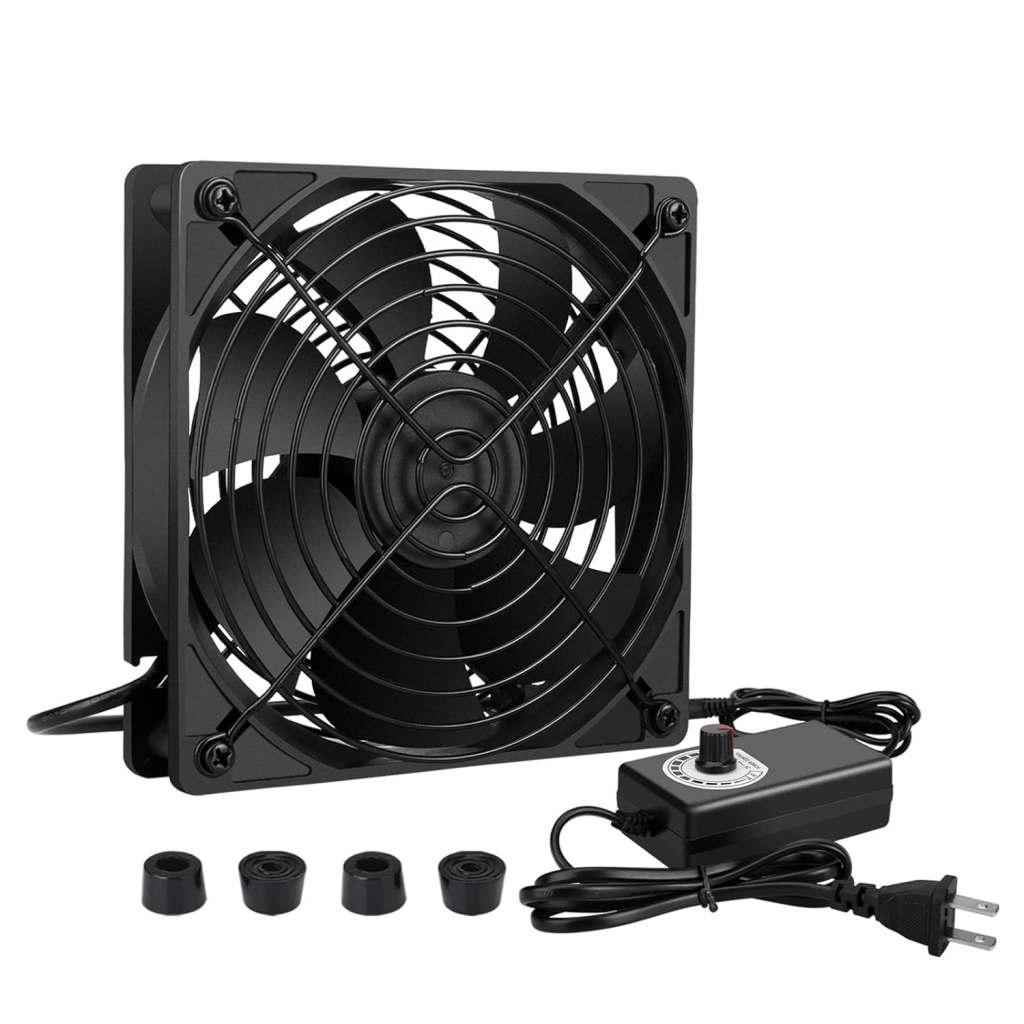
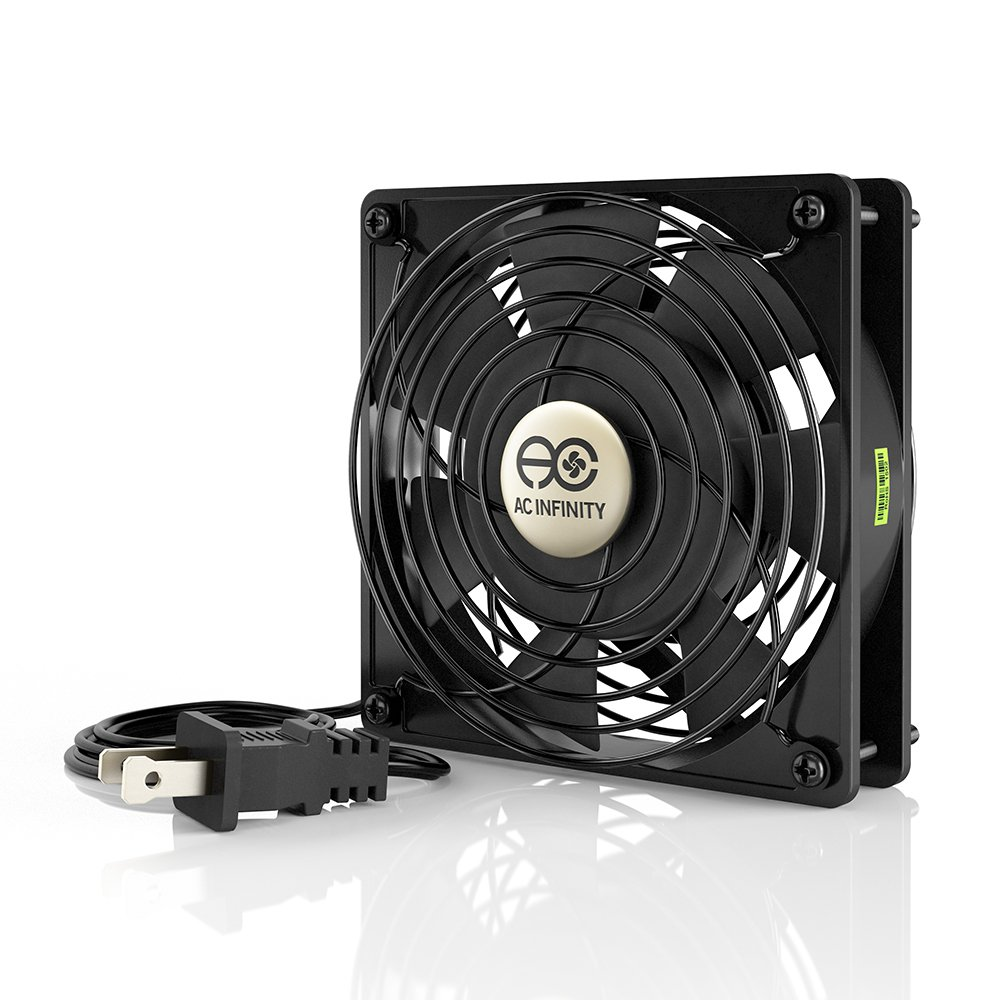
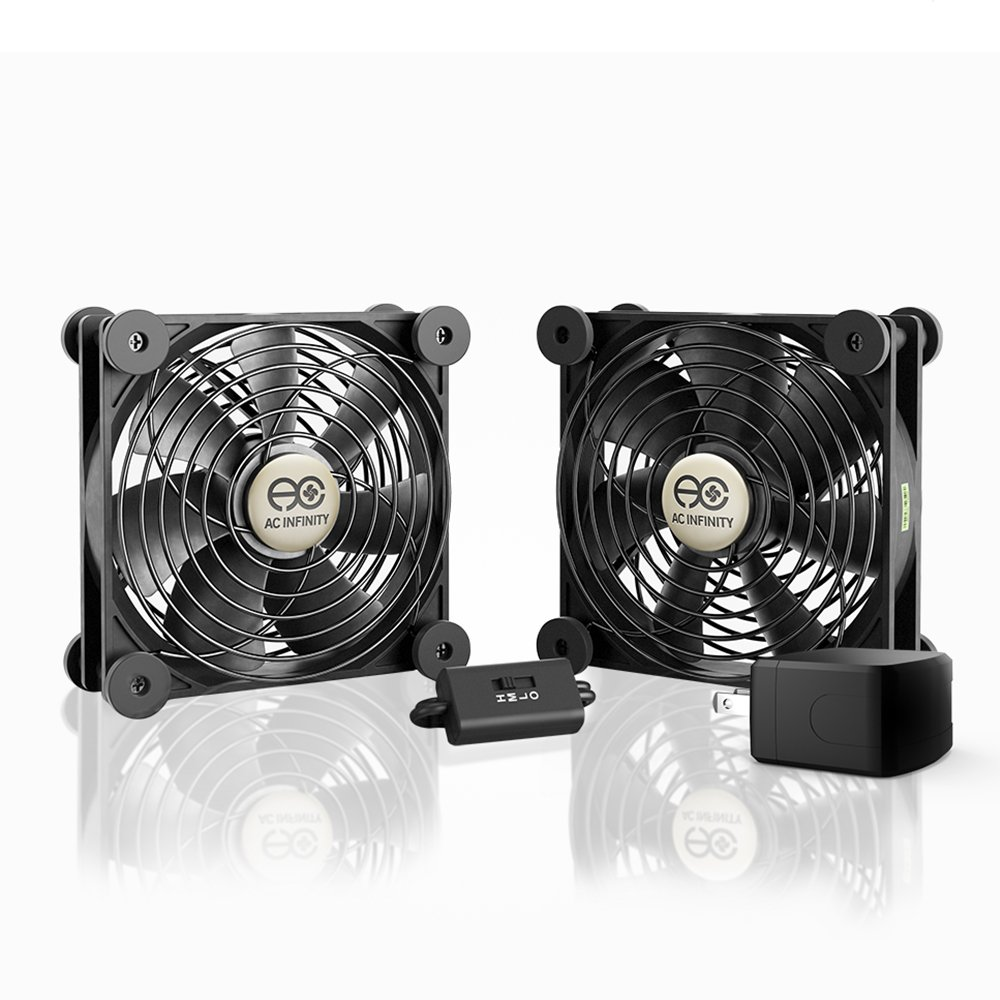
Circulating Fan:
We can use the cooling fan as our circulating fan. Two or Four fans will be good for our incubator. These circulating fans should be positioned inside in a circular way. This will maintain good air circulation as well as it will reduce concentrated heat build-up. A positioning like this will be enough to maintain proper air circulation.

Relay switch:
Relays are an efficient and reliable choice for switching AC-powered incandescent lamps used as heaters. While there are multiple ways to control heating and cooling elements, relays provide a simple and effective solution for beginners.
In this project, we will use a relay to control both the heater (lamp) and the cooling fan. This allows us to automate temperature regulation, ensuring a stable incubation environment.
Why Use Relays?
- Easy AC switching – Ideal for controlling high-power loads like lamps and fans.
- Isolation from the microcontroller – Protects sensitive electronics from high-voltage circuits.
- Reliable operation – A straightforward and tested method for automation.
While advanced methods like solid-state relays (SSR) or triac-based circuits can also be used, relays remain a cost-effective and beginner-friendly choice for this egg incubator project.

Temperature Sensor:
There are different types of temperature sensors available in the market. You can use any of that if you wish and know how to use it. But here in our project, we’ll use an LM35 Temperature sensor.

This sensor gives 10mV/’C. From that linear data, we can calculate the actual temperature.
Humidity Control:
To regulate humidity in an egg incubator, the first step is to measure it accurately. In this project, we will use the DHT11 humidity sensor to monitor the humidity levels inside the incubator.
Why Use DHT11?

- Affordable & Readily Available – Ideal for beginner projects.
- Measures Both Temperature & Humidity – Provides dual functionality.
- Easy Interface with Arduino – Uses a simple digital signal for data transmission.
Once we have humidity data, we can implement automated control mechanisms, such as activating a water misting system or humidifier, to maintain the optimal incubation environment.
Simple Humidity Control for a Small Egg Incubator
To maintain proper humidity inside the incubator, a humidifier is usually required. However, for small incubators, commercially available humidifiers are not suitable because they produce excessive fog too quickly.
Alternative Humidity Control for Small Incubators:
Instead of using a humidifier, we will use a simple and effective method:
- A small bowl of clean water placed inside the incubator.
- Cotton balls or a piece of cotton cloth inside the bowl to aid in gradual evaporation.
How This Works
- The warm temperature and airflow inside the incubator will slowly evaporate the water, helping to naturally regulate humidity.
- The cotton helps increase the surface area for evaporation, ensuring a more stable moisture level.
Monitoring & Automation
- The DHT11 sensor will monitor the humidity.
- The control circuit will trigger an alarm if the humidity goes too high or too low.
- We only need to occasionally check and refill the water bowl to keep the system running smoothly.
This simple setup provides an easy-to-maintain solution for humidity control in small egg incubators!
Turning:
For turning purposes, you can do that yourself with your hand if you can not arrange a tray like this:
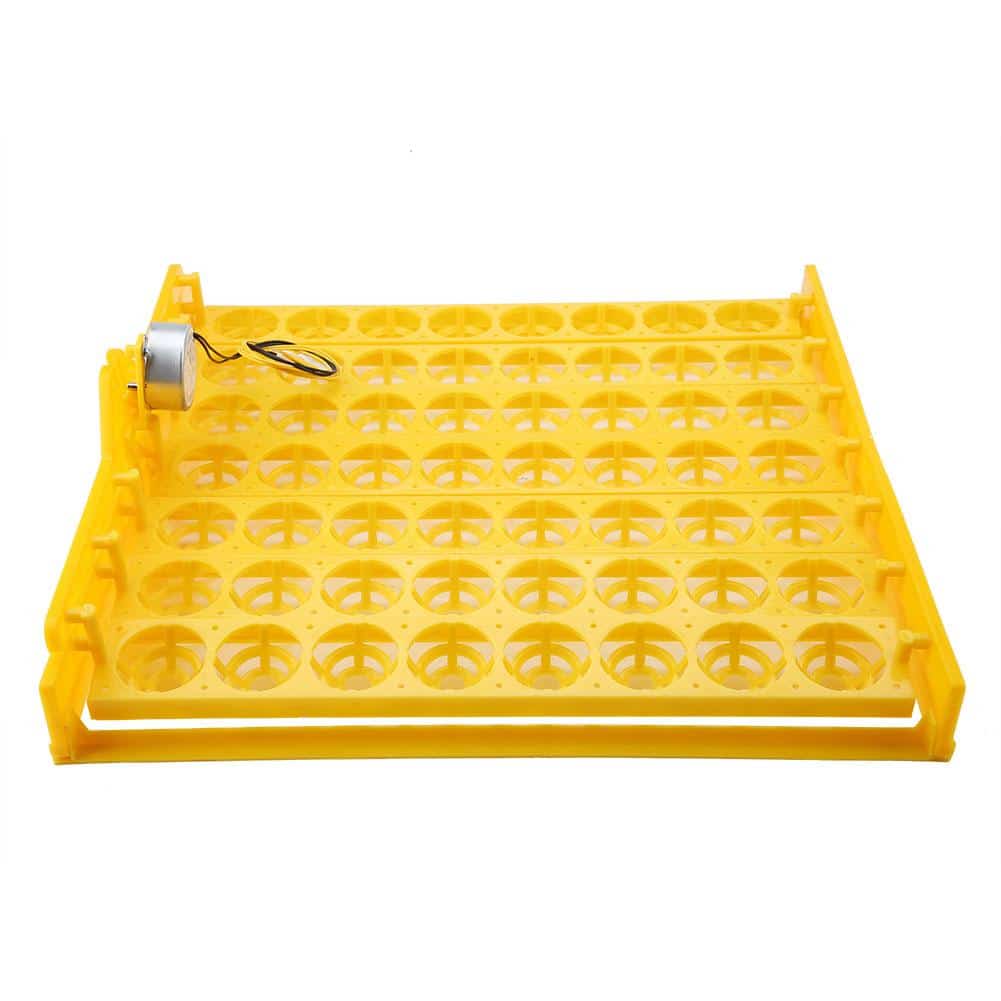
In this project, I used an existing tray I had in stock, but you can choose any tray that fits your design. However, I would recommend using a tray similar to the one I’m using for optimal results.
Egg Turning Mechanism
The tray is powered by a bi-directional turning motor, which helps rotate the tray to gently turn the eggs. What makes this system particularly convenient is that the motor is rated for 220V AC, simplifying the design and eliminating the need for low-voltage motor control systems.
Turning Interval and Angle
The eggs need to be turned periodically to ensure even development. We aim to rotate the eggs from -45° to +45° around the middle, and this should occur every 30 to 45 minutes. This turning process mimics the natural behavior of a hen and is essential for healthy egg hatching.
Read more:
- Connect to Raspberry Pi from your Laptop/Desktop using VNC Viewer
- How to reduce noise from DC motor
- Interfacing External EEPROM with PIC microcontroller
- Designing a High-Efficiency DC-DC Converter: Step-by-Step Guide
Block Diagram:
Here is the block diagram of our Arduino-based egg incubator:

Control circuit:
Now that we’ve gathered all the necessary accessories, it’s time to build the control circuit. For this project, we’re using the Arduino UNO as the controller. As one of the most popular microcontrollers, the Arduino UNO is perfect for both beginners and experienced developers alike. Its user-friendly design and extensive community support make it an ideal choice for creating reliable and efficient control systems. Let’s dive into the process of integrating the components and bringing the project to life!

Circuit analysis:
The control circuit for this project is designed to be simple yet effective. Relays are used to control various components such as lamps, cooling fans, and motors. To drive these relays, the ULN2003A relay driver is employed for smooth operation.
For audio alerts, we’ve integrated a buzzer, which serves as the alarm system for the project. To regulate the temperature, a variable resistor (potentiometer) is used, allowing easy tuning.
The power supply for this circuit is sourced from a 12V/3000mA Transformer (TR1), along with a Bridge Diode (BR1) and Capacitor (C1) for stable DC output. To protect the Arduino UNO from potential overvoltage damage, we utilize an LM7812 voltage regulator that ensures a steady 12V power supply to the board.
The LM35 temperature sensor is connected to the A1 pin, while the DHT11 humidity sensor is hooked up to the D13 pin. Additionally, a user potentiometer is connected to the A0 pin of the Arduino UNO for manual adjustments.
Working principle:
Once the input parameters are sensed, the Arduino UNO takes charge of managing the system’s operations, including controlling the heater, cooler, lamps, and other connected devices, based on the temperature readings.
The system is designed to maintain the temperature around 36.8°C. When the temperature is too low, the lamps automatically turn on to provide warmth. If the temperature exceeds 0.5°C above the setpoint, the heater is turned off to prevent overheating. If the temperature rises above 1.5°C from the setpoint, the cooler is activated to bring the temperature back down.
In cases where the temperature reaches 2°C above the setpoint, the buzzer sounds an alarm to alert the user. Additionally, the circulating fan operates based on the state of the heater. When the heater is on, the circulating fan runs continuously. If the heater is off but the temperature is still above the setpoint, the circulating fan runs periodically (with intervals of being on and off).
The turning motor is activated for 3-4 seconds every 30 minutes to maintain proper airflow and environment within the incubator. While the exact timing isn’t calculated precisely, this timing is managed using a timer interrupt on the Arduino, simulating a timer function. For small incubators, this timing works effectively for periodic turning.
Coding:
Here is the Arduino coding for our Arduino-based egg incubator. Code is very simple and easy to understand.
#include <LiquidCrystal.h>
#include <TimerOne.h>
#include "DHT.h"

// Pin assignments
#define Heater 2
#define Cooler 8
#define Fan 12
#define Buzzer 7
#define Turning 9
#define DHTPIN 13
#define DHTTYPE DHT11

// Constants
#define SETPOINT_SENSOR_PIN A0
#define TEMP_SENSOR_PIN A1
#define TEMPERATURE_CONTROL_INTERVAL 30  // Read temperature and setpoint every 30ms

// Control macros
#define Heater_ON digitalWrite(Heater, HIGH)
#define Heater_OFF digitalWrite(Heater, LOW)
#define Cooler_ON digitalWrite(Cooler, HIGH)
#define Cooler_OFF digitalWrite(Cooler, LOW)
#define Fan_ON digitalWrite(Fan, HIGH)
#define Fan_OFF digitalWrite(Fan, LOW)
#define Turning_ON digitalWrite(Turning, HIGH)
#define Turning_OFF digitalWrite(Turning, LOW)
#define Buzzer_ON digitalWrite(Buzzer, HIGH)
#define Buzzer_OFF digitalWrite(Buzzer, LOW)

// Variables
LiquidCrystal lcd(11, 10, 6, 5, 4, 3);
DHT dht(DHTPIN, DHTTYPE);

float Temperature = 0;
float Setpoint = 0;
unsigned long timer_counter = 0;
unsigned long lastFanToggleTime = 0;
unsigned long fanToggleInterval = 500; // Interval to toggle the fan

void setup() {
  pinMode(Heater, OUTPUT);
  pinMode(Cooler, OUTPUT);
  pinMode(Fan, OUTPUT);
  pinMode(Buzzer, OUTPUT);
  pinMode(Turning, OUTPUT);

  lcd.begin(16, 2);
  lcd.setCursor(0, 0);
  lcd.print("Egg Incubator");

  Buzzer_ON;
  delay(100);
  Buzzer_OFF;

  dht.begin();
  delay(2000);

  lcd.clear();

  Timer1.initialize(100000); // Timer interrupt every 100ms
  Timer1.attachInterrupt(timerIsr);
  lcd.clear();
}

void loop() {
  Read_temp();
  Read_setpoint();
  PrintTemp();
  Read_DHT11();
  Temperature_control();
}

void timerIsr() {
  // Turning control using timer interrupt
  timer_counter++;

  if (timer_counter > 16200 && timer_counter < 16500) {
    Turning_ON;
  } else {
    Turning_OFF;
  }

  if (timer_counter > 16500) {
    timer_counter = 0;
  }
}

void Temperature_control() {
  // Check the temperature to control heater, cooler, and fan
  if (Temperature >= Setpoint + 0.5) {
    Heater_OFF;

    // Fan toggle logic
    unsigned long currentMillis = millis();
    if (currentMillis - lastFanToggleTime >= fanToggleInterval) {
      lastFanToggleTime = currentMillis;
      Fan == HIGH ? Fan_OFF : Fan_ON;
    }

    if (Temperature >= Setpoint + 1.5) {
      Cooler_ON;
    } else {
      Cooler_OFF;
    }

    if (Temperature >= Setpoint + 2.0) {
      Buzzer_ON;
    } else {
      Buzzer_OFF;
    }
  } else if (Temperature <= Setpoint - 0.5) {
    Heater_ON;
    Fan_ON;
    Cooler_OFF;

    if (Temperature <= Setpoint - 1.0) {
      Buzzer_ON;
    } else {
      Buzzer_OFF;
    }
  }
}

void Read_temp() {
  Temperature = 0;
  for (int i = 0; i < 30; i++) {
    Temperature += analogRead(TEMP_SENSOR_PIN) * 0.5;
    delay(10);
  }
  Temperature /= 30;
}

void Read_setpoint() {
  Setpoint = 0;
  for (int i = 0; i < 30; i++) {
    Setpoint += analogRead(SETPOINT_SENSOR_PIN) / 25.6;
    delay(2);
  }
  Setpoint /= 30;
}

void PrintTemp() {
  lcd.setCursor(9, 0);
  lcd.print("S:");
  lcd.print(Setpoint, 1);

  lcd.setCursor(0, 0);
  lcd.print("T:");
  lcd.print(Temperature - 1, 1);
  lcd.write(223);  // Degree symbol
  lcd.print("C");
}

void Read_DHT11() {
  float h = dht.readHumidity();

  lcd.setCursor(0, 1);
  lcd.print("H:");
  lcd.print(h);
  lcd.print("%");

  lcd.setCursor(9, 1);
  lcd.print("S:86%");  // Static display for the setpoint
}
As this code is not so critical, so I think you can understand it easily.

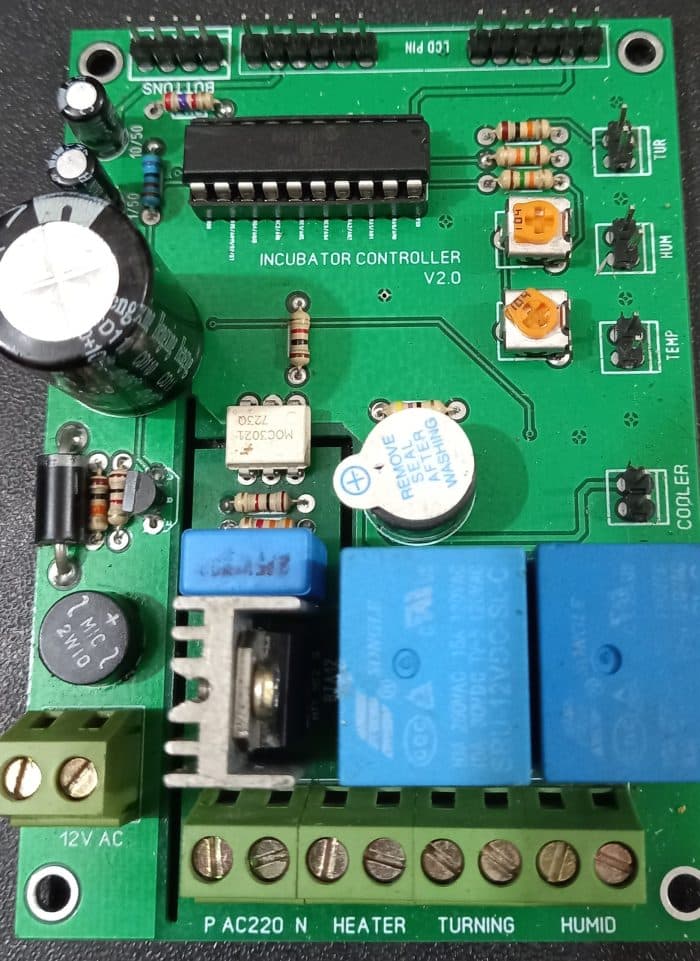
PCB:
I like to work with PCBs. So I make PCBs for all of my projects.

Result:
It’s great to hear that your incubator project is up and running! A 70% hatching rate is already a solid result, especially for a prototype, and as you mentioned, refining the design and construction will likely improve it further. Your commercial incubators performing at an 85% success rate sounds impressive, and the bigger capacity and standardized build likely help optimize conditions. Have you identified any specific areas in the prototype that could be improved for better consistency and higher hatching success?

This is an open-sourced one to help you learn. But if you are interested in professional designs like this or even more, feel free to contact me.
Conclusion:
I hope you enjoyed following this project and were able to build one for yourself. If you have any questions or need assistance along the way, don’t hesitate to reach out. I’m happy to help. Thank you for your interest and good luck with your project!
Liked this article? Subscribe to our newsletter:
or,
Visit LabProjectsBD.com for more inspiring projects and tutorials.
Thank you!
Read More:
- Connect to Raspberry Pi from your Laptop/Desktop using VNC Viewer
- How to reduce noise from DC motor
- Interfacing External EEPROM with PIC microcontroller
- Remote control with the security of user verification using NodeMCU v3
- Step-by-Step Guide to Building an MPPT Controller with Arduino and a Synchronous Buck Converter


39 Comments
Deponkor · 12/12/2020 at 1:01 pm
Nice project..
But If This project with set up button (high – low temperature & humidity & trunning motor ) manully occur is good. if u want change and modify ,I will respect u.
Mithun K. Das · 12/12/2020 at 2:49 pm
If you understand the working principle, you can add buttons for settings.
Desifon Elektronik · 04/04/2022 at 4:37 am
Hi, how are we going to set the humidity value, 55% average value should be entered in the development period, 60-65% in the last three days of hatching period… Can’t you fix the project? Thanks…
MKDas · 04/04/2022 at 12:24 pm
Ha ha ha. I’m a professional man. I’ve over 20 industrial designs on egg incubators and those hatch millions of eggs per month. But this site is a blog site and this is for education. to share knowledge, not full but the basic knowledge. So that you can use it.
https://shiatsu-web.com · 13/02/2021 at 10:55 am
This is something New !
https://www.shinsen-mart.com · 22/02/2021 at 9:30 am
Best view i have ever seen !
Mete · 05/06/2021 at 8:31 pm
Can you share the proteus file? [email protected] thanks.
MKDas · 06/06/2021 at 4:52 am
I’ll share it on the blog later.
Mete · 07/06/2021 at 8:37 pm
Please. i need urgent
MKDas · 08/06/2021 at 6:03 am
Check again and don’t forget to subscribe. Some awesome and useful projects are coming soon.
Steve · 23/06/2021 at 11:42 pm
Great project and well elaborated….
I tend to ask the same question as Deponkor as some of us are so new with Arduino uno and it’s working principles
MKDas · 24/06/2021 at 6:29 am
Yes, It’s not very complex to add buttons. But to make it simple and easy to understand I kept it simple.
GWA Michael Terungwa · 25/07/2021 at 7:12 am
Am impressed with your work.
Can the work be modify and control using network.
That is using mobile phone?
MKDas · 25/07/2021 at 8:04 am
Thank you. No, this one is not remote-controlled. I’ll post something with remote access in the future. IoT-based projects.
Paul · 07/02/2022 at 3:10 pm
I am making one of these and I have some doubts in the connection. How can I reach you? Is there any way?
MKDas · 07/02/2022 at 6:52 pm
email >> contact us
roy · 08/02/2022 at 8:01 am
hi sir can i have all the values of the electronic components you use ?
MKDas · 09/02/2022 at 10:19 am
check the circuit diagram.
tycs · 10/02/2022 at 8:42 pm
hi i cannot compile the ino.file its giving me errors
C:\Users\IANMOO~1\AppData\Local\Temp\ccKCBuBC.ltrans0.ltrans.o: In function `setup’:
C:\Users\Ian Moone\Documents\Arduino\egg_incubator/egg_incubator.ino:40: undefined reference to `DHT::begin(unsigned char)’
C:\Users\IANMOO~1\AppData\Local\Temp\ccKCBuBC.ltrans0.ltrans.o: In function `Read_DHT11′:
C:\Users\Ian Moone\Documents\Arduino\egg_incubator/egg_incubator.ino:156: undefined reference to `DHT::readHumidity(bool)’
C:\Users\IANMOO~1\AppData\Local\Temp\ccKCBuBC.ltrans0.ltrans.o: In function `__static_initialization_and_destruction_0′:
C:\Users\Ian Moone\Documents\Arduino\egg_incubator/egg_incubator.ino:22: undefined reference to `DHT::DHT(unsigned char, unsigned char, unsigned char)’
collect2.exe: error: ld returned 1 exit status
exit status 1
Error compiling for board Arduino Uno.
This report would have more information with
“Show verbose output during compilation”
option enabled in File -> Preferences.
MKDas · 11/02/2022 at 4:25 pm
DHT library problem. use different library.
Tycs · 11/02/2022 at 5:10 am
Hi sir I cannot compile the Ino file
MKDas · 11/02/2022 at 4:26 pm
reinstall library
tycs · 12/02/2022 at 10:00 am
hi, sir i still cannot compile can you tell me what dht library you used ? also for the timerOne. If its no too much to ask maybe you can also share with me the schematic and board file for this i also want to make a pcb. thank you sir
MKDas · 12/02/2022 at 11:19 am
maybe DHT_master. I can not remember right now. Kindly try altering.
Tycs · 12/02/2022 at 8:16 pm
Thank you
Tycs · 14/02/2022 at 11:34 am
hi, sir i have compiled the .ino file succesfully. I was wondering if you have the brd and sch file for this ? i would like to make the pcb for the circuit. I noticed that you placed the eletronics inside the incubator, will this be fine for long term use? since there is humidity inside the incubator ?
thank you
MKDas · 15/02/2022 at 11:22 am
Nice to know that you are successful now. I made it in PCB, but unfortunately, the file is no more, it’s already modified. & Yes, you should be careful putting the circuit inside the incubator. I put inside as it was a test purpose only. But when you are using it in a regular scenario, you should put the circuits outside the incubator.
Tycs · 15/02/2022 at 9:40 am
sir in the schematic i can’t seem to find where vdd of lcd and sensors dht11 are connected to ? i checked online dht11 is 5v.
MKDas · 15/02/2022 at 11:22 am
symbolic. 5V
Tycs · 22/02/2022 at 7:13 am
Hi sir, I have constructed the arduino using breadboard since I’m not sure if it will work. I noticed that in the schematic dht Data out has a resistor to vdd bit in your pcb there is no resistor is the resistor necessary?
MKDas · 22/02/2022 at 12:33 pm
If you use a module, you need no resistor. Because there is a resistor already in that module. But if you use only the sensor, then you need to use a pull up resistor of 4K7.
Tycs · 23/02/2022 at 9:07 pm
thank you very much sir. i have finished the board and it seems to be working. next i will try to construct an eclosure to test.
MKDas · 24/02/2022 at 10:17 am
Good to know that!!!
Tycs · 29/04/2022 at 5:40 pm
hi sir. i have finally build the incubator with the arduino controller. I i am running into some problems with the controller. first I noticed the heater fan does not turn off. second problem is i noticed that the arduino will freeze up, after turning the egg turner. The lcd will print garbled stuff and the temperature readings are all still.
Tycs · 04/05/2022 at 4:42 pm
some update. ok so the lcd will freeze up after sometime, there seems to be some sort of interference. but the arduino still functions fine (except for the display) I also noticed that the the code is not being followed i don’t know if this is normal after set point is reached, it drops 2.5 degress before turning on the heaters. also the cooler also turns on even if it hasn’t reached the +1.5 degrees from set point. the circulating fan does not turn off when heater is dis-engaged.
MKDas · 04/05/2022 at 5:34 pm
Kindly let me know the details about your circuit, components you are using and voltage readings.
Tycs · 07/05/2022 at 6:28 pm
Hi sir, what voltage should I measure. From your circuit I basically copied from your pcb layout except on a breadboard. I am using a 220v turning motor. For fans I’m using a 12v fan. I noticed the problem starts after around 30 mins when the turning motor start the lcd will get distorted. I don’t know if this has something to do with my wiring. I joined the a/c the heater and turning motor wires and the DC circulating fan and cooling fan in one whole. So basically they all wires came out in one whole. Would this be the problem?
MKDas · 07/05/2022 at 7:43 pm
Seems like your motor is creating trouble. Run without turning the motor. Check what happens. Also, on the breadboard, flying wires capture noises, try to make a PCB, and test it. Many people including my local made this project. All worked fine.
MKDas · 04/05/2022 at 5:32 pm
What type of cooling Fan you are using? Also what turning motor you are using? Seems like Electro-Magnetic Interference is generating anyhow.