In this article, we are going to learn how you can use a GSM module with your Raspberry Pi to send SMS or do whatever you need to do. Here, we’ll use a GSMHat for raspberry pi which will be connected through USB with the Pi. So let’s start!
⚠️Disclaimer:
Working with electricity involves serious risk. Ensure you have the necessary skills and take proper safety precautions before attempting any electrical projects. Proceed at your own risk — the author assumes no responsibility for any damage, injury, or issues resulting from the use or misuse of the information provided.
All content on this website is original and protected by copyright. Please do not copy or reproduce content without permission. While most of the resources shared here are open-source and freely accessible for your learning and benefit, your respect for our intellectual effort is appreciated.
If you find our tutorials helpful, consider supporting us by purchasing related materials or sharing our work — it helps keep the content flowing.
Need help or have questions? Leave a comment below — the author is always happy to assist!
Table of Contents
GSM/GPRS/GNSS HAT:
GSM/GPRS/GNSS Hat is specially designed for Raspberry Pi. You can use a USB port to connect or simply use the GPIO pins as well.
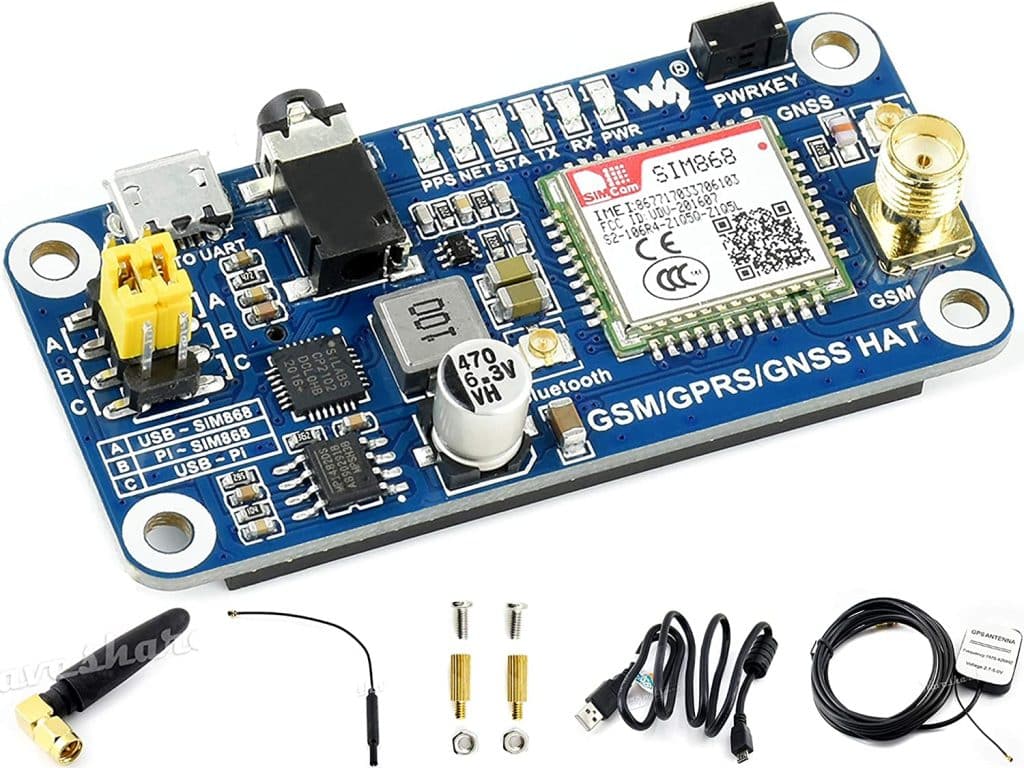
The module is developed by Web share. You can visit their site and learn about the details of this module. Of course, you can use other modules, but I had this to test the project, so I used it.
Setup your Pi:
We need to set up our Pi to run the code. But we need some information before that. When you are connecting the USB port, you need to find the port number.
type ‘ls -m /dev/tty*‘ on cmd pad and Pi will return you a list like this:
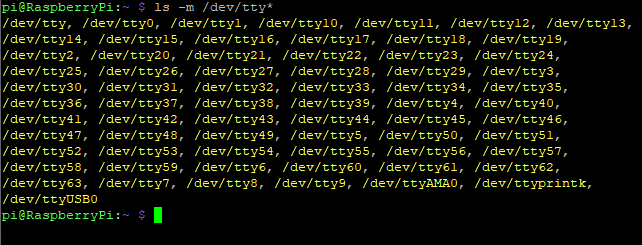
Now, remove your USB port and do this again. There will be a change in return as you disconnected your USB. And from comparing these two replies, you can easily find your port.
In my case, it was /dev/ttyUSB0
Now, open python and start writing this code:
Python Code to send SMS:
import serial
import time

ser = serial.Serial('/dev/ttyUSB0', 9600, timeout = 1)


def getResponse(cmd,reply,timeout):
    cmd = cmd + '\r'
    print('CPU'+':'+cmd)
    ser.write(bytes(cmd,'utf-8'))
    time.sleep(0.01)
    for i in range (0,timeout):
        in_msg=ser.readline()
        in_msg = in_msg.decode('utf-8').strip()
        time.sleep(0.01)
        ans=in_msg.find(reply)
        if(ans!=-1):
            i=timeout
    print('GSM'+':'+in_msg)
    time.sleep(0.5)

def gsmPrint(cmd,timeout):
    cmd = cmd + '\r'
    print('CPU'+':'+cmd)
    ser.write(bytes(cmd,'utf-8'))
    time.sleep(0.01)
    for i in range (0,timeout):
        in_msg=ser.readline()
        in_msg = in_msg.decode('utf-8').strip()
        time.sleep(0.01)
        if(len(in_msg)>0): #someting on reply
            i=timeout
    print('GSM'+':'+in_msg)
    time.sleep(0.5)

def gsmEndcommand():
    ser.write(bytes(chr(26),'utf-8'))
    time.sleep(1)
    in_msg=ser.readline()
    in_msg = in_msg.decode('utf-8').strip()
    print('GSM'+':'+in_msg)
    time.sleep(1)


getResponse('AT','OK',2)
getResponse('AT+CMGF=1','OK',2)
getResponse('AT+CMGS=\"xxxxxxxxxxxxx\"','OK',2) #put your number replacing 'xxxxxxxxxxxxx'
gsmPrint('Testing self pythopn lybrary to send SMS. _Mithun',2)
gsmEndcommand()
Now, run your code and the Pi will send SMS to your number and the Shell will show you something like this.
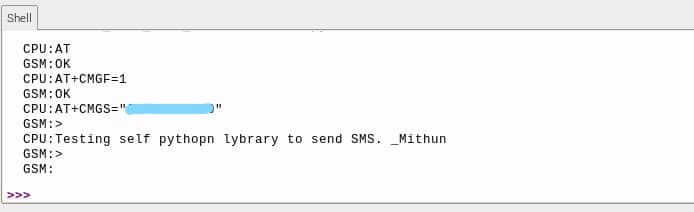
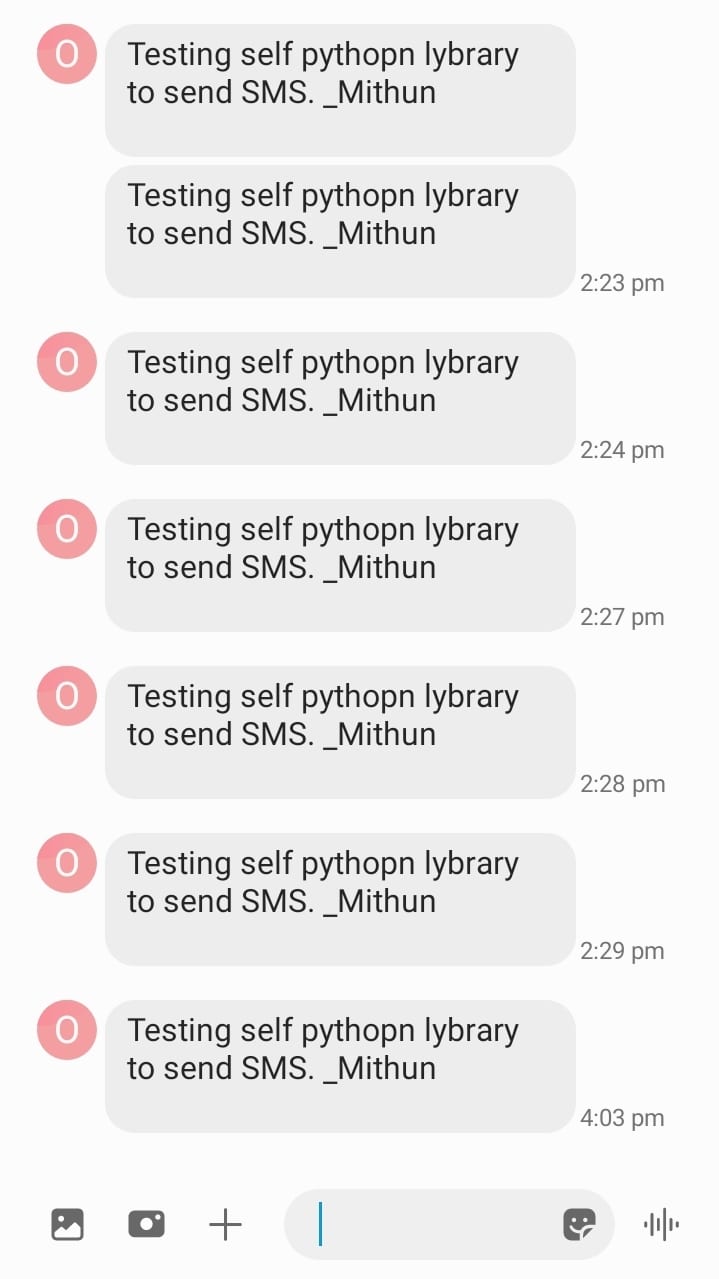
And the result is on your phone! you’ll get a SMS if there is no error.
End:
Now, you can easily modify texts or numbers as per your requirement to Send SMS from Raspberry Pi. And remember, this code is just one cycle. To run it in infinity, simply put the code in a while loop. And you know how to do that in python. I hope, this article was helpful for you. If so, kindly share it. Thanks.
Liked this article? Subscribe to our newsletter:
or,
Visit LabProjectsBD.com for more inspiring projects and tutorials.
Thank you!
Read more:
- Connect to Raspberry Pi from your Laptop/Desktop using VNC Viewer
- How to reduce noise from DC motor
- Read ThingSpeak Channel using ESP8266 and Arduino
- Reading SMS with Arduino
- Caller ID detection using Arduino
- Energy-saving innovative power switch for microcontroller circuit
- STM32 as USB Device
- Send SMS from Raspberry Pi using the GSM module
- Make an MPPT Solar charge Controller with Synchronous Buck Converter


3 Comments
EDUARDO · 03/07/2022 at 3:42 pm
thank you for your great selfless contribution
Deepak · 19/10/2024 at 11:56 am
thanks for posting here. How to check if my GSM is working. Kinldy help. I tried the above code and got reply-
CPU:AT
Traceback (most recent call last):
File “/home/pi/Desktop/Emergency alert/trial1.py”, line 43, in
getResponse(‘AT’,’OK’,2)
File “/home/pi/Desktop/Emergency alert/trial1.py”, line 11, in getResponse
in_msg = in_msg.decode(‘utf-8’).strip()
UnicodeDecodeError: ‘utf-8’ codec can’t decode byte 0xc3 in position 1: invalid continuation byte
MKDas · 27/10/2024 at 2:04 pm
this may happen due to the variable size. try using increasing the size of the variable.