Looking to get started with STM32 microcontrollers? This beginner’s guide will walk you through everything you need to know, from choosing a development board and software to setting up your development environment and creating your first project. Follow these simple steps and start building your own projects with STM32 microcontrollers today.
⚠️Disclaimer:
Working with electricity involves serious risk. Ensure you have the necessary skills and take proper safety precautions before attempting any electrical projects. Proceed at your own risk — the author assumes no responsibility for any damage, injury, or issues resulting from the use or misuse of the information provided.
All content on this website is original and protected by copyright. Please do not copy or reproduce content without permission. While most of the resources shared here are open-source and freely accessible for your learning and benefit, your respect for our intellectual effort is appreciated.
If you find our tutorials helpful, consider supporting us by purchasing related materials or sharing our work — it helps keep the content flowing.
Need help or have questions? Leave a comment below — the author is always happy to assist!
Table of Contents
STM32:
STM32 microcontrollers are popular among hobbyists and professionals alike, thanks to their powerful features, affordability, and ease of use. If you’re new to STM32 microcontrollers, this beginner’s guide will help you get started.
What are STM32 Microcontrollers?
STM32 microcontrollers are a family of 32-bit microcontrollers designed and manufactured by STMicroelectronics. They come in a variety of families, including STM32F0, STM32F1, STM32F2, STM32F3, STM32F4, STM32F7, and STM32H7, each with its own set of features and capabilities.

STM32 microcontrollers are widely used in a variety of applications, including automotive, industrial, and consumer electronics. They are also popular among hobbyists and makers, thanks to their affordability and ease of use.
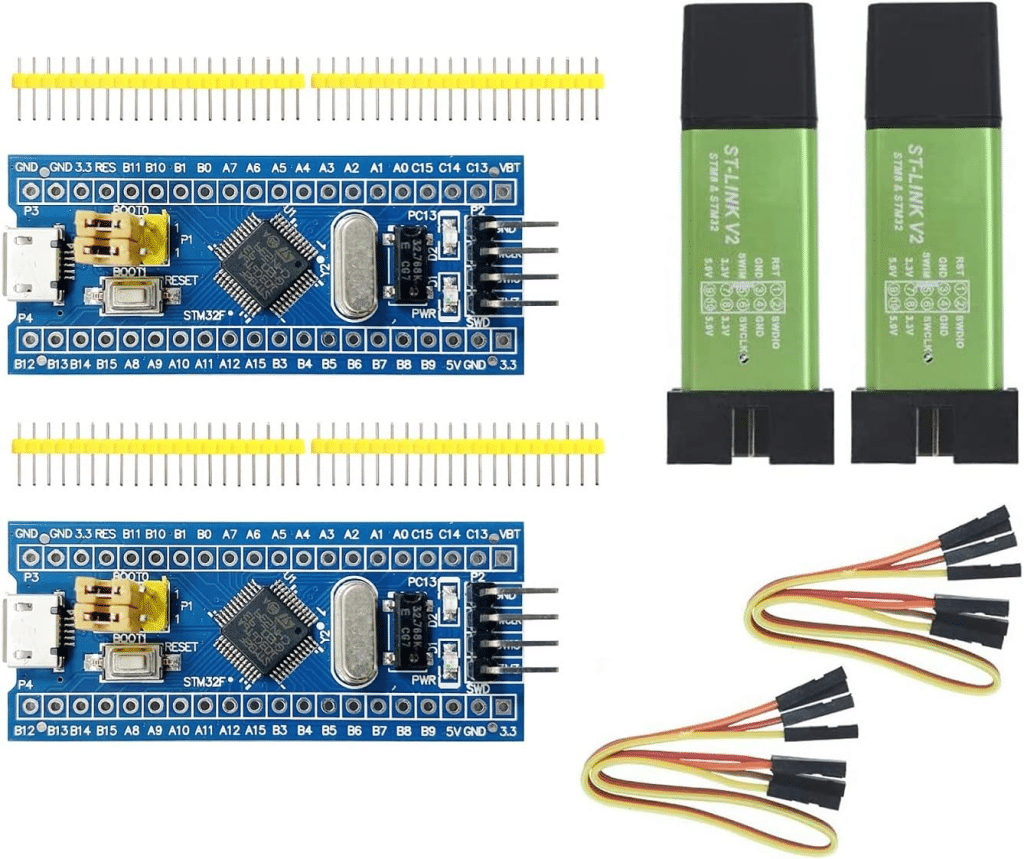
There are several boards with STM32 such as:

Getting Started with STM32 Microcontrollers:
To get started with STM32 microcontrollers, you’ll need the following:
- STM32 Development Board: You can choose from a variety of STM32 development boards, such as the STM32 Nucleo, STM32 Discovery, or STM32F4-Discovery. These boards are affordable and come with all the necessary components, including the microcontroller, debugger, and development software.
- Development Software: To develop software for STM32 microcontrollers, you’ll need an Integrated Development Environment (IDE) that supports STM32 development. Some popular options include STM32CubeIDE, Keil µVision, and Atollic TrueSTUDIO.
- USB Cable: You’ll need a USB cable to connect your development board to your computer.
- Power Supply: You’ll need a power supply to power your development board. Most development boards come with a built-in power regulator that allows them to be powered via USB.
Setting Up Your Development Environment:
Once you have your development board and software, it’s time to set up your development environment. Here are the steps you need to follow:

- Install the Development Software: Download and install the IDE that you’ve chosen for STM32 development. Follow the instructions provided by the manufacturer to install the software.
- Connect Your Development Board: Connect your development board to your computer using a USB cable.
- Configure Your IDE: Open your IDE and configure it to work with your development board. Most IDEs come with a tool called STM32CubeMX, which allows you to configure your development board and generate code. Follow the instructions provided by the manufacturer to configure your IDE.
- Create Your First Project: Once your IDE is configured, create your first project. Your IDE should provide a template project that you can use as a starting point. Follow the instructions provided by the manufacturer to create your first project.
- Build and Flash Your Project: Once you’ve created your project, build it and flash it to your development board. Follow the instructions provided by the manufacturer to build and flash your project.
Conclusion:
Getting started with STM32 microcontrollers is easy and affordable, thanks to the wide range of development boards and software available. Follow the steps outlined in this guide to set up your development environment and create your first project. With a little practice, you’ll be able to create complex projects using STM32 microcontrollers in no time!
You can read more on:
- How to interface EEPROM with STM32
- Learn how to use the Real-time Clock (RTC) of STM32
- How to interface micro SD cards with STM32
- I2C communication with STM32
- SPI communication with STM32
- Introducing RTOS with stm32
- Internal Temperature of STM32
Liked this article? Subscribe to our newsletter:
or,
Visit LabProjectsBD.com for more inspiring projects and tutorials.
Thank you!


0 Comments