Sometimes, we need to measure or check the internal temperature of the microcontrollers for safety reasons. So, in this article, I’ll cover how to measure the Internal Temperature of STM32 microcontrollers using the STM32CubeIDE compiler. So let’s begin.
⚠️Disclaimer:
Working with electricity involves serious risk. Ensure you have the necessary skills and take proper safety precautions before attempting any electrical projects. Proceed at your own risk — the author assumes no responsibility for any damage, injury, or issues resulting from the use or misuse of the information provided.
All content on this website is original and protected by copyright. Please do not copy or reproduce content without permission. While most of the resources shared here are open-source and freely accessible for your learning and benefit, your respect for our intellectual effort is appreciated.
If you find our tutorials helpful, consider supporting us by purchasing related materials or sharing our work — it helps keep the content flowing.
Need help or have questions? Leave a comment below — the author is always happy to assist!
Table of Contents
Why need to measure Internal Temperature?
The answer is simple, for safety. Sometimes the MCU can become overheated. So to ensure MCU is not getting burnt, and for safety measures, we can monitor this temperature from time to time. And is important for industrial systems where downtime should not be over a limit.
Steps:
First, after project creation or from any existing project, go to ADC settings and select the internal temperature sensing channel.
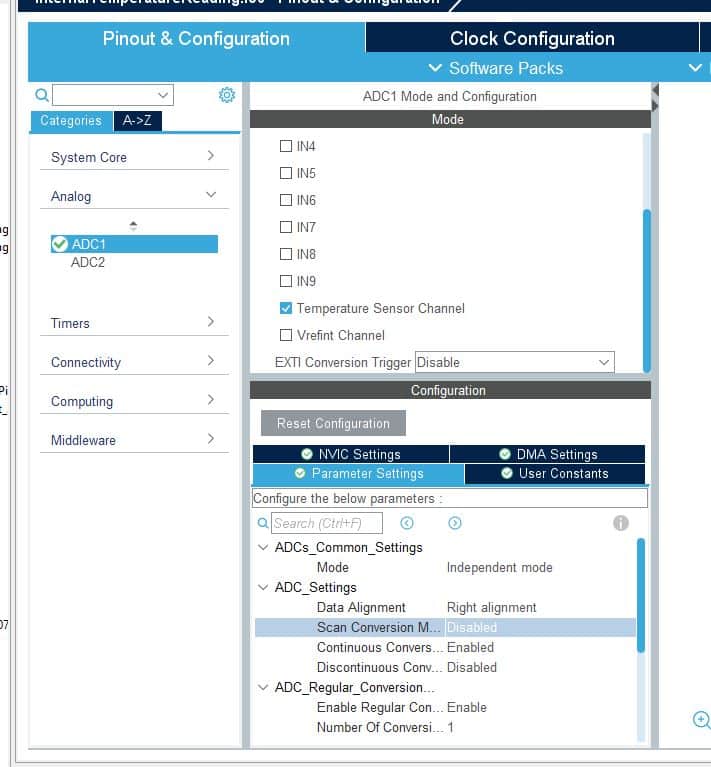
And from the Continuous Conversion: select Enable. And then from Rank, select the max sample you want. Note that, the more the sample more the time and the more stable the reading.

Now save the project to generate or add code to your existing project.
After saving, simply add the following lines. Note: You can set any name as you want for the variables.
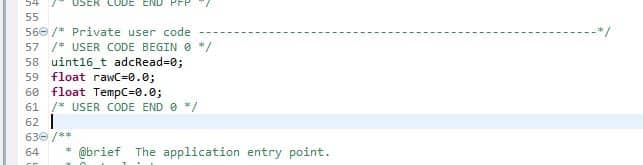

Here, I took 5 samples and then made an average value. Which gives a stable reading. But keep in mind that, as this is an additional feature for a MCU or project, so you should allocate the memory for this task comparing other main tasks.
Now, the code is ready. Compile and debug for the result.
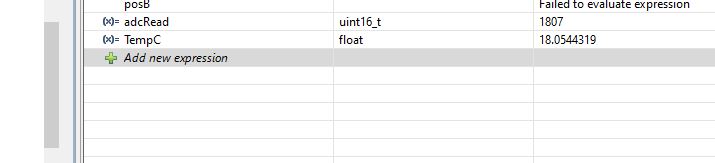
In my case, it was the result on average. Also, note that this reading will change frequently. And it depends on the internal CPU load. So you may find that the temperature is fluctuating within a limit.
Calculation:
Now, you may ask where I get the calculation. Then, you have to read this application note and goto page 236.
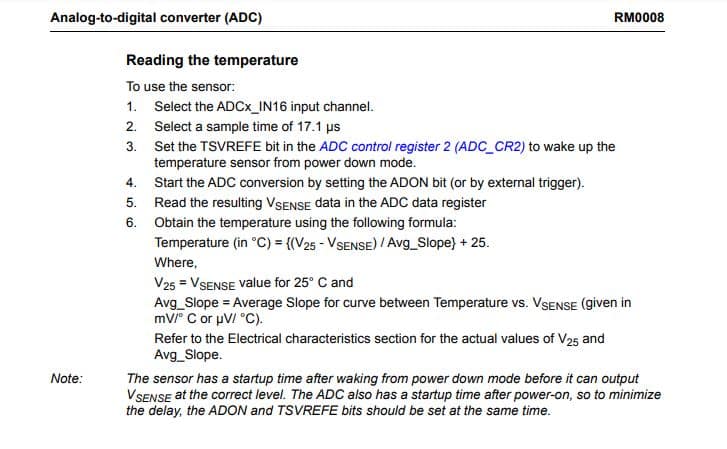
You will get a relation between the internal temperature sensor and the ADC. Now, what are those Vsense?
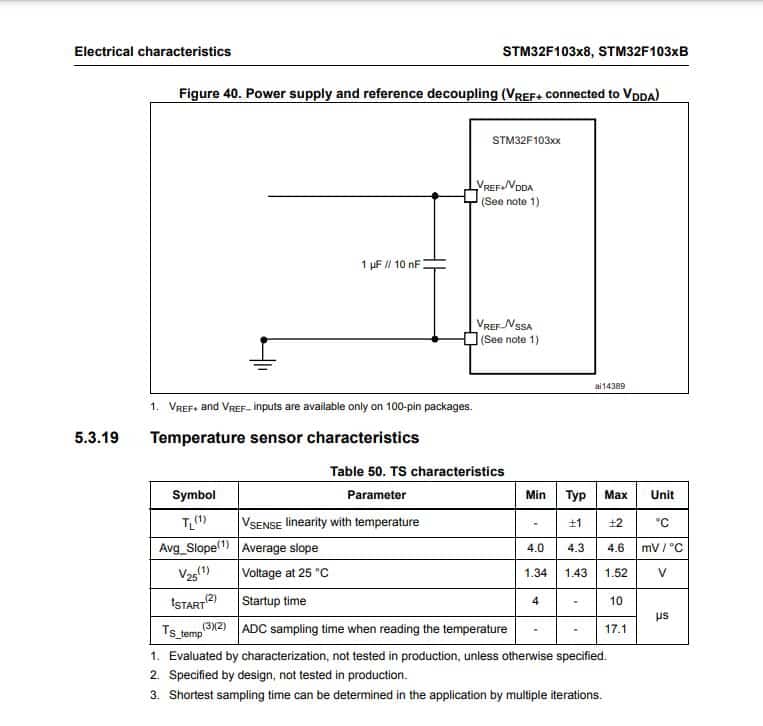
For that, you need to read the datasheet of your microcontroller. In my case, it was like this:
So, putting all these values, the equation forms like this:
V25 = 1.43
Avg_Slope = 4.3 mV/C = 0.0043 V/C
VSENSE = 3.3/4096 * ADCReading
Temperature (in °C) = {(1.43 – 3.3/4096 * ADCReading) / 0.0043} + 25
Temperature (in °C) = {332.558 – 0.187364 * ADCReading} + 25
Temperature (in °C) = 357.558 – 0.187364 * ADCReading
And this calculation is used in the code. Also note that you can do all these calculations within your code, but it will consume RAM and ROM. So, if you can simplify the calculations, MCU consumes less RAM. So? Why not?
End:
I hope, this article will help you in your project by adding protection or just for curiosity. See you soon with the next article.
You can read other articles too:
- Fingerprint attendance system with R503
- PWM Generation with STM32
- Reading ADC with DMA in STM32 MCU
- ADC Reading with STM32103C8Tx (BluePill)
- STM32 as USB Device
- Pure sine wave inverter using PIC16F76
- Arduino based egg incubator
- Make an MPPT Solar charge Controller with Synchronous Buck Converter
Liked this article? Subscribe to our newsletter:
or,
Visit LabProjectsBD.com for more inspiring projects and tutorials.
Thank you!


0 Comments