In the last 13 chapters, we have learned the most basic things we need to learn to start with a PIC microcontroller. This is a summary of all chapters. Now we’ll recall the previous chapters and what else we need to learn more about and how will be discussed in this article. So stay connected.
⚠️Disclaimer:
Working with electricity involves serious risk. Ensure you have the necessary skills and take proper safety precautions before attempting any electrical projects. Proceed at your own risk — the author assumes no responsibility for any damage, injury, or issues resulting from the use or misuse of the information provided.
All content on this website is original and protected by copyright. Please do not copy or reproduce content without permission. While most of the resources shared here are open-source and freely accessible for your learning and benefit, your respect for our intellectual effort is appreciated.
If you find our tutorials helpful, consider supporting us by purchasing related materials or sharing our work — it helps keep the content flowing.
Need help or have questions? Leave a comment below — the author is always happy to assist!
Table of Contents
About previous chapters:
The learning started from a very basic one and then gradually we have seen individual sections to learn. Let’s list them here as a Summary of all chapters.
- Basics of MCU: Learning PIC Microcontroller Programming in C [Chapter 1]
- Basics of mikroC pro for PIC: Learning PIC Microcontroller Programming in C [Chapter 2]
- Creating a new project in mikroC: Learning PIC Microcontroller Programming in C [Chapter 3]
- How to use microcontroller: Learning PIC Microcontroller Programming in C [Chapter 4]
- Improve your code learning PIC MCU in C [Chapter 5]
- Interfacing passive components: Learning PIC Microcontrollers [Chapter 6]
- Learning PIC MCU: How to interface buttons with microcontrollers [Chapter 7]
- Learning ADC of PIC microcontrollers: Learning PIC microcontrollers [Chapter 8]
- Understanding Timer0: Learning PIC Microcontrollers [Chapter 9]
- Using Timer0 as a Counter: Learning PIC Microcontrollers [Chapter 10]
- PWM and CCP module: Learning PIC microcontrollers [Chapter 11]
- USART communication using PIC microcontroller: Learning PIC Microcontrollers [Chapter 12]
- I2C and SPI communication: Learning PIC microcontrollers[Chapter 13]
- One-wire communication: Learning PIC Microcontrollers [Chapter 14]
There are many more things to learn about the microcontrollers to start learning PIC microcontrollers. But if we keep learning only, we’ll be out of focus gradually. So, these are the chosen chapters you can practice and the rest of the things will be learned automatically with practical projects.
Some general knowledge you need to keep in mind besides these.
How to choose an MCU:
Whenever you need an MCU for any circuit or project, the first step is to gather all the necessary points that the circuit must have, then calculate how many pins you’ll need also the type of PINs such as ADC pins, I/O pins, etc. After that, calculate max required memory. In this case, take some extra always. Then compare MCUs with that requirement with price and market availability.
After that, recheck everything if it is ok to choose that MCU for your project. If all is good, to start or not. Then make a small simulation or prototype if possible. Test it with some most important code blocks. Then finalize the circuit and develop everything else.
Tips:
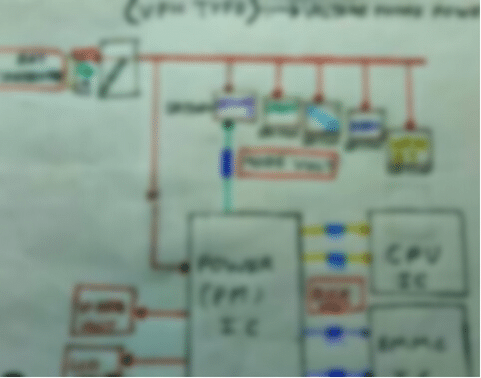
My personal tip for this is to use notebooks and multicolor pens. Then write/draw blocks you need. Connect them one to another as needed. Write notes in blocks or lines, and write opinions/thinking/conditions and everything you are planning.
Then observe it, feel it, and make it inside your head. Then execute it one by one.
Also, this is your Intellectual Property. Do not share it. 👍👍👍
Summary of all chapters:
Organizing a series on PIC microcontrollers sequentially is a fantastic approach for learners. Breaking down the learning process into manageable chapters can make it easier for anyone to grasp the concepts gradually. And you’re right—practice is key! It not only reinforces what you’ve learned but also helps in building confidence and proficiency. Plus, creating small projects along the way is an excellent way to apply your knowledge and see it in action. Keep up the great work in guiding others through their learning journey!
End:
That sounds like a solid plan! Starting with the basics and gradually moving on to practical projects is a great way to approach learning about PIC microcontrollers. It ensures a strong foundation while also keeping things engaging and hands-on. And you’re right to emphasize the importance of not rushing through the fundamentals—mastering them will make tackling more complex projects much easier down the road. Looking forward to seeing what practical projects you have in store!
Liked this article? Subscribe to our newsletter:
or,
Visit LabProjectsBD.com for more inspiring projects and tutorials.
Thank you!


2 Comments
Adarsh M · 24/07/2024 at 5:55 pm
hello Sir i just want genrate three phase sine wave signals with pic16f1503 microcontroller ,
can you guide me to create the code
MKDas · 24/07/2024 at 6:52 pm
Use dsPIC. PIC16F Series is not suitable for this. Good luck!